Colors
Color Calibration
Siril offers two ways to retrieve the colors of your image. Here, "retrieve" means re-balancing the RGB channels to get as close as possible to the true colors of the shot object.
Manual Color Calibration
Warning
The color calibration must be performed on a linear image whose histogram has not yet been stretched. Otherwise, the colors obtained are not guaranteed to be correct.
The manual way uses the following window:
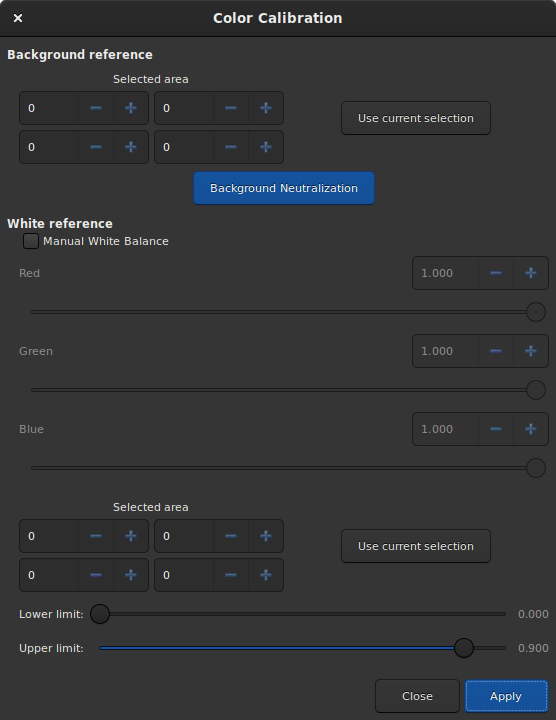
Manual Color Calibration dialog window.
The first step deals with the background of your image. The goal is to equalize the RGB layers in order the background appears as a neutral grey color.
After making a selection in your image (in a not so crowdy nor contrasted area), the area is taken into account by clicking on the Use current selection button. The coordinates of the rectangle are displayed. Then Background Neutralization will calculate the median of each channel and equalize them.
The second step deals with the bright objetcs of the picture. You can modify once again the histogram in two ways:
Manually, with White reference and the 3 R, G and B coefficients, according to your own taste.
Automatically, by selecting a rectangle area with contrasted objects (the same way as previously)
Two sliders allow you to change the rejection limit for too dark and too bright pixels in the selection.
As this is a trial and error process, you can undo the result with the Undo button (up left) and then try with other selections or coefficients until you are satisfied.
Photometric Color Calibration
Warning
The calibration of the colors by photometry must imperatively be carried out on a linear image whose histogram was not yet stretched. Otherwise, the photometric measurements will be wrong and the colors obtained without guarantee of being correct.
Another way for retrieving the colors is to compare the color of the stars in the image with their color in catalogues, to obtain the most natural color in an automatic and non-subjective way. This is the PCC (Photometric Color Calibration) tool (Ctrl + Shift + P). It can only work for images taken with a set of red, green and blue filters for colors, or on-sensor color. To identify stars within the image with those of the catalogue, an astrometric solution is required. Please see the documentation of the plate solver module.
This method is less accurate than Spectrophotometric Color Calibration explained below, however it can be performed using local catalogues and is therefore the best option when an internet connection is not available.
Note
This technique is heavily dependent on the type of filter used. Using different kinds of R, G, B filters will not make a large difference, but using a Light pollution filter or no IR-block filters will make the solution deviate significantly and not give the expected colors.
Since version 1.4, the two tools run independently: it is possible to run the
photometric analysis and color correction of the image only if the image has
been already plate solved. It also means different catalogues can be used for
PCC and astrometry. The tool is also available as the pcc command, so it can
be embedded in image post-processing scripts.
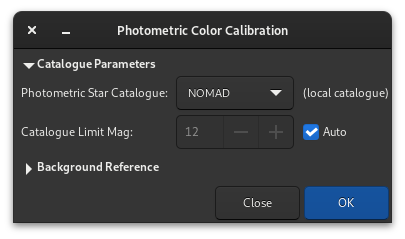
Photometric Color Calibration dialog window.
If the image was previously plate solved, turn on the annotations feature to check that catalogues align with the image. If the astrometric solution is not good enough, please redo a plate solving.
The Catalog Settings section allows you to choose which photometric catalog should be used, NOMAD, APASS or Gaia DR3, as well as the limiting magnitude.
Tip
The NOMAD catalog can be locally installed, while the APASS and GAIA catalogs require internet access to obtain their contents.
The Star Detection section allows you to manually select which stars will be used for the photometry analysis. It's better to have hundreds of them at least, so individual picking would not be ideal.

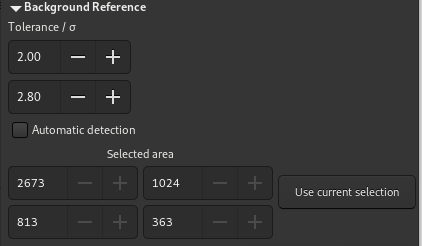
If desired, the Background Reference can be manually selected as described in Manual Color Calibration. This can be useful in the case of nebula images where the background sky parts are small.
When enough stars are found and the astrometric solution is correct, the PCC will print this kind of text in the Console tab:
Applying aperture photometry to 433 stars.
70 stars excluded from the calculation
Distribution of errors: 1146 no error, 18 not in area, 48 inner radius too small, 4 pixel out of range
Found a solution for color calibration using 363 stars. Factors:
K0: 0.843       (deviation: 0.140)
K1: 1.000       (deviation: 0.050)
K2: 0.743       (deviation: 0.130)
The photometric color correction seems to have found an imprecise solution, consider correcting the image gradient first
We can understand that 433 stars were selected from the catalogue and the image for photometric analysis, but somehow, only 363 we actually used, 70 being excluded. The line Distribution of errors explains for what reason they were excluded: 18 were not found in the expected position, 48 were too big and 4 probably saturated. It is very common to have many stars rejected because they don't meet the strict requirements for a valid photometric analysis.
We can also see that the PCC found three coefficients to apply to the color channels to correct the white balance. The deviation here, which is the average absolute deviation of the color correction for each of the star of the photometric set, is moderately high. On well calibrated images without gradient, with correct filters and without a color nebula covering the whole image, devation would get closer to 0.
Siril command line
pcc [-limitmag=[+-]] [-catalog=] [-bgtol=lower,upper]
Spectrophotometric Color Calibration
Warning
The calibration of the colors by photometry must imperatively be carried out on a linear image whose histogram was not yet stretched. Otherwise, the photometric measurements will be wrong and the colors obtained without guarantee of being correct.
Spectrophotometric Color Calibration (Ctrl + Shift + C) is the newest method of color calibration available in Siril. This method uses the extensive spectral data available in the Gaia DR3 online catalogue [GaiaDR3]. Owing to the data volumes, this method is only available when an internet connection is available: there is no offline version of the Gaia DR3 xp_sampled spectrum database that Siril can use.
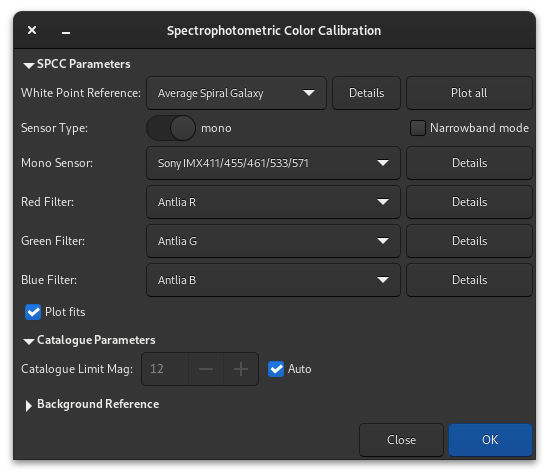
SpectroPhotometric Color Calibration dialog window.
How it Works
SPCC requires knowledge of your sensor and the RGB filters you use. These are provided through an online repository which Siril will sync, either automatically at startup or manually when required. Sensor and filter information is updated via the same synchronization method as used for the online scripts repository. (This means that as data on new filters or sensors becomes available it can be added to the repository without requiring an update to the application.)
In the GUI you select your sensors and filters from the widgets in the SPCC dialog. Don't worry if there isn't an exact match for your equipment, just pick the closest option, or the appropriate default option. You also need to select a white reference. The default reference is the Average Spiral Galaxy reference which is suitable for a wide range of astrophotographic scenes, however there is an extensive range of galaxy and star types to choose from. The Sun's spectral type is G2(iv) so if you want to balance your image using sunlight as a white reference, you would pick Star, type G2(iv) from the list.
SPCC then uses the stellar spectra in Gaia DR3 and knowledge of your imaging sensor and filters to compute for each star in the catalogue that matches a star detected in the image by Siril the expected flux in each color channel. It then compares this with the actual flux measured in each channel using Siril's photometric capabilities.
Given the sensor and filter knowledge, SPCC computes the expected flux in each channel for the specified white reference. A robust linear fit is obtained to give the best fit of catalogue to image R/G and B/G flux ratios for each star and for the white reference. This fit is used to derive correction coefficients which are applied multiplicatively to each channel, resulting in spectrophotometrically accurate color channels.
Your image must be plate solved for SPCC to work: if it is not already, this should be done with the dedicated tool. It is important to make sure that the plate solving information is correct, as some software is known to add inaccurate WCS data to images.
Graphical Interface
Selection of Sensor In order to select your sensor, ensure that the mono / OSC toggle button is set correctly. You will then see the appropriate dropdown to choose from the available sensors.
Selection of Filters SPCC can operate in two modes.
The default mode is broadband operation. In this mode, the Narrowband mode check box should be unchecked. You can choose either red, green and blue filters (for composited images made with a mono sensor) or OSC filters, for example light pollution filters, for images made with an OSC sensor.
By checking the Narrowband mode check box, you enable narrowband mode. This is intended either for images composited from narrowband filters used with a mono sensor or for images made using an OSC sensor with a dual, tri-band or quad band narrowband filter. In this mode the available controls change, and for each color channel you enter the nominal wavelength and bandwidth of the filter passband. For ultra-narrowband mono filters the passband may be as little as 3nm; for a quadband OSC filter like the Altair QuadBand V2 the passbands may be as much as 35nm. Note that for a HOO composition where two channels are set to the same data, the nominal wavelength and bandwidth should be set equal in the SPCC interface too.
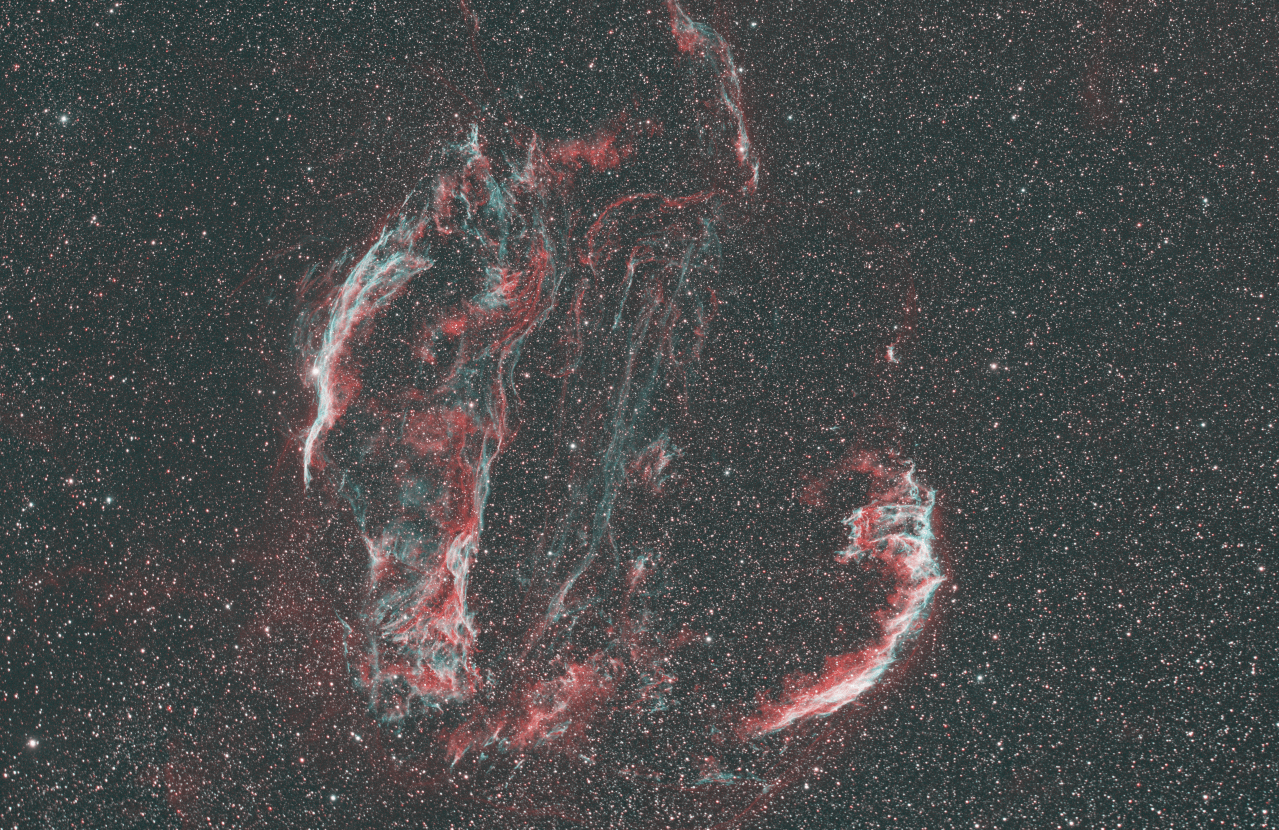
Calibrated HOO image. Image by Cyril Richard.
Tip
Some manufacturers specify a center wavelength and FWHM. It is fine to use the FWHM as the bandwidth: these filters have very sharp cutoffs.
Warning
Don't expect to retrieve the Hubble palette for SHO imaging using the wavelengths of the SII, \(\text{H}_\alpha\) and OIII filters respectively. The result will be an image with a huge green cast. This is easily explained by the fact that the SII emission line is much fainter than that of hydrogen, and the SPCC gives a representation of real intensities. But this is not the case in the Hubble palette. In fact, manual color calibration will give better results.
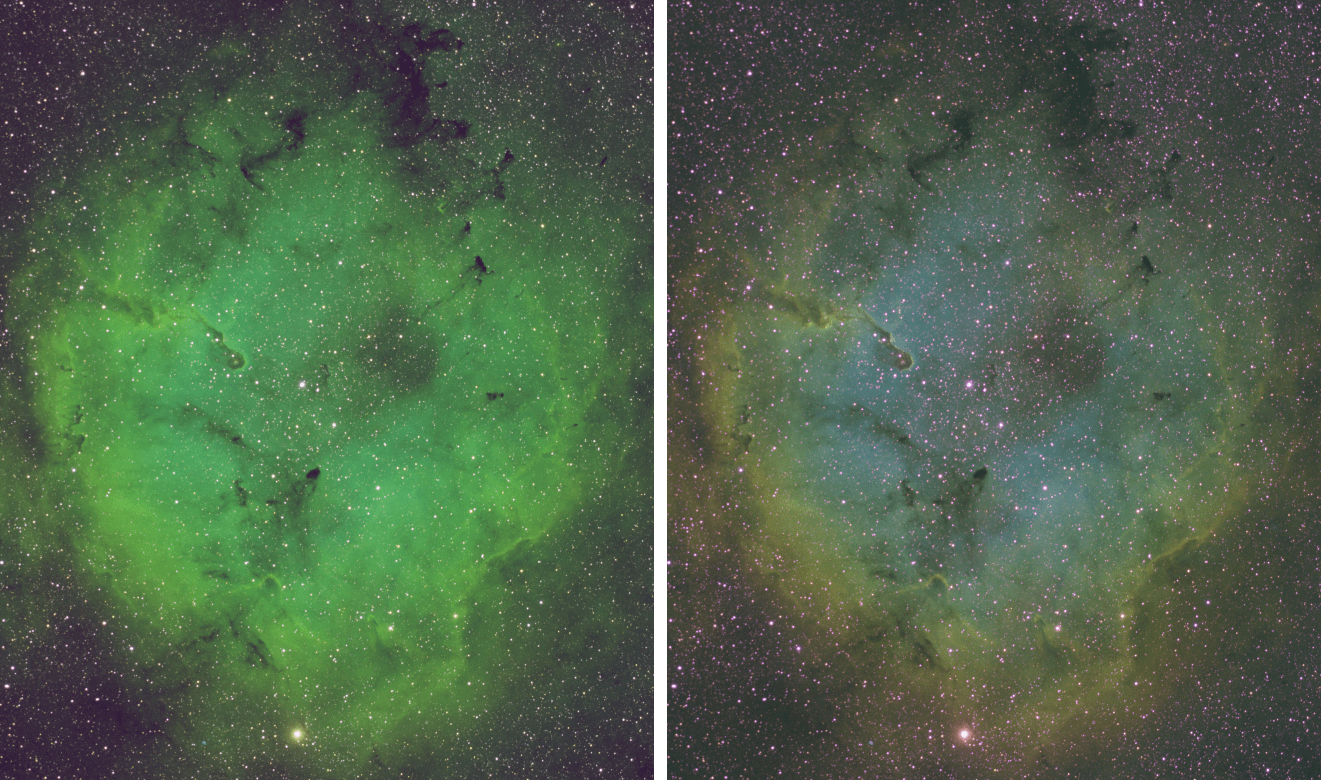
SHO image calibrated by SPCC compared to the same, manually calibrated one. The entire nebula was taken as a white reference during manual calibration. Image by Cyril Richard.
Selection of DSLR Low Pass Filter (LPF) DSLRs contain a low-pass filter (sometimes also called a 'hot mirror'. These reduce transmittance at wavelengths of interest to astronomers (Ha at 656nm and S-II at 674nm). If the selected OSC is a DSLR, a dropdown will be provided from which you can the appropriate LPF profile. Options exist for stock LPFs as well as astro-modified LPFs and an ideal Full spectrum filter model for if the LPF has been removed altogether.
Selection of White Reference SPCC requires an absolute white reference spectrum. The default is Average Spiral Galaxy and the source spectra used to create this white reference are taken from the SWIRE templates [SWIRE] in a manner consistent with other astrophotography software providing the same white reference. A wide range of other white references is available, covering the full range of galaxy and star classifications [Stellar]. If you wish to use sunlight as your white reference, you would choose the white reference Star, type G2(iv) as the Sun is a type G2(iv) star.
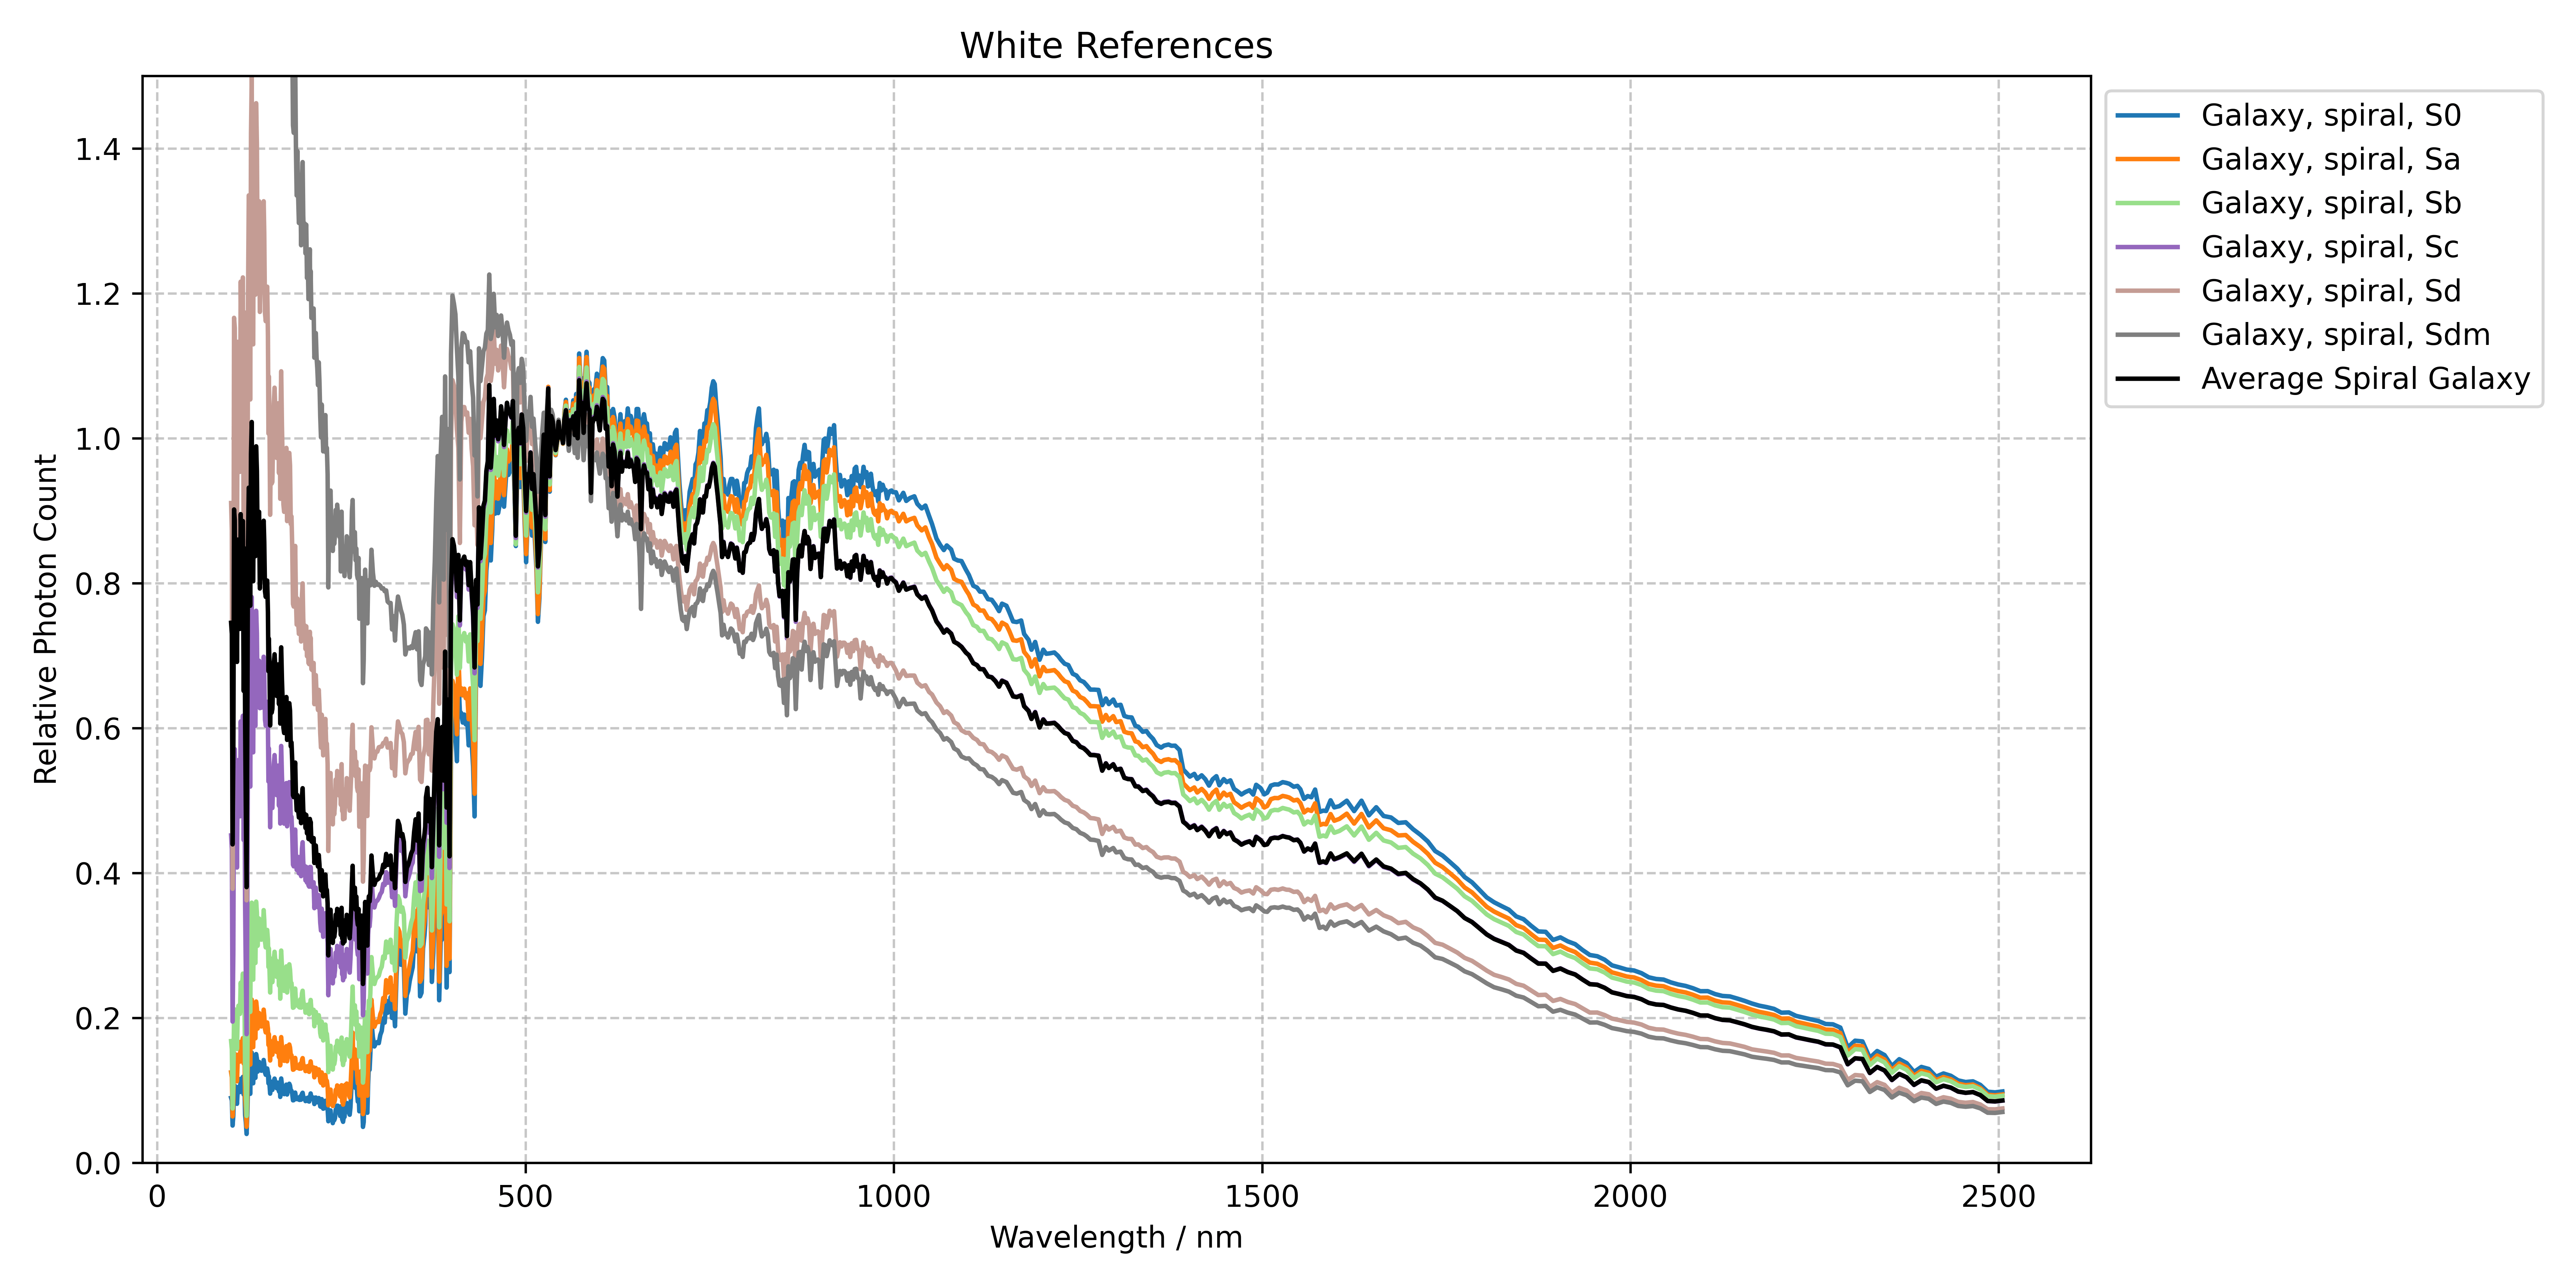
Graphs showing white reference data from spiral galaxies. At around 350 nm, the Average Spiral Galaxy data become identical to the Sc galaxies, which are also a good representation of the white reference.
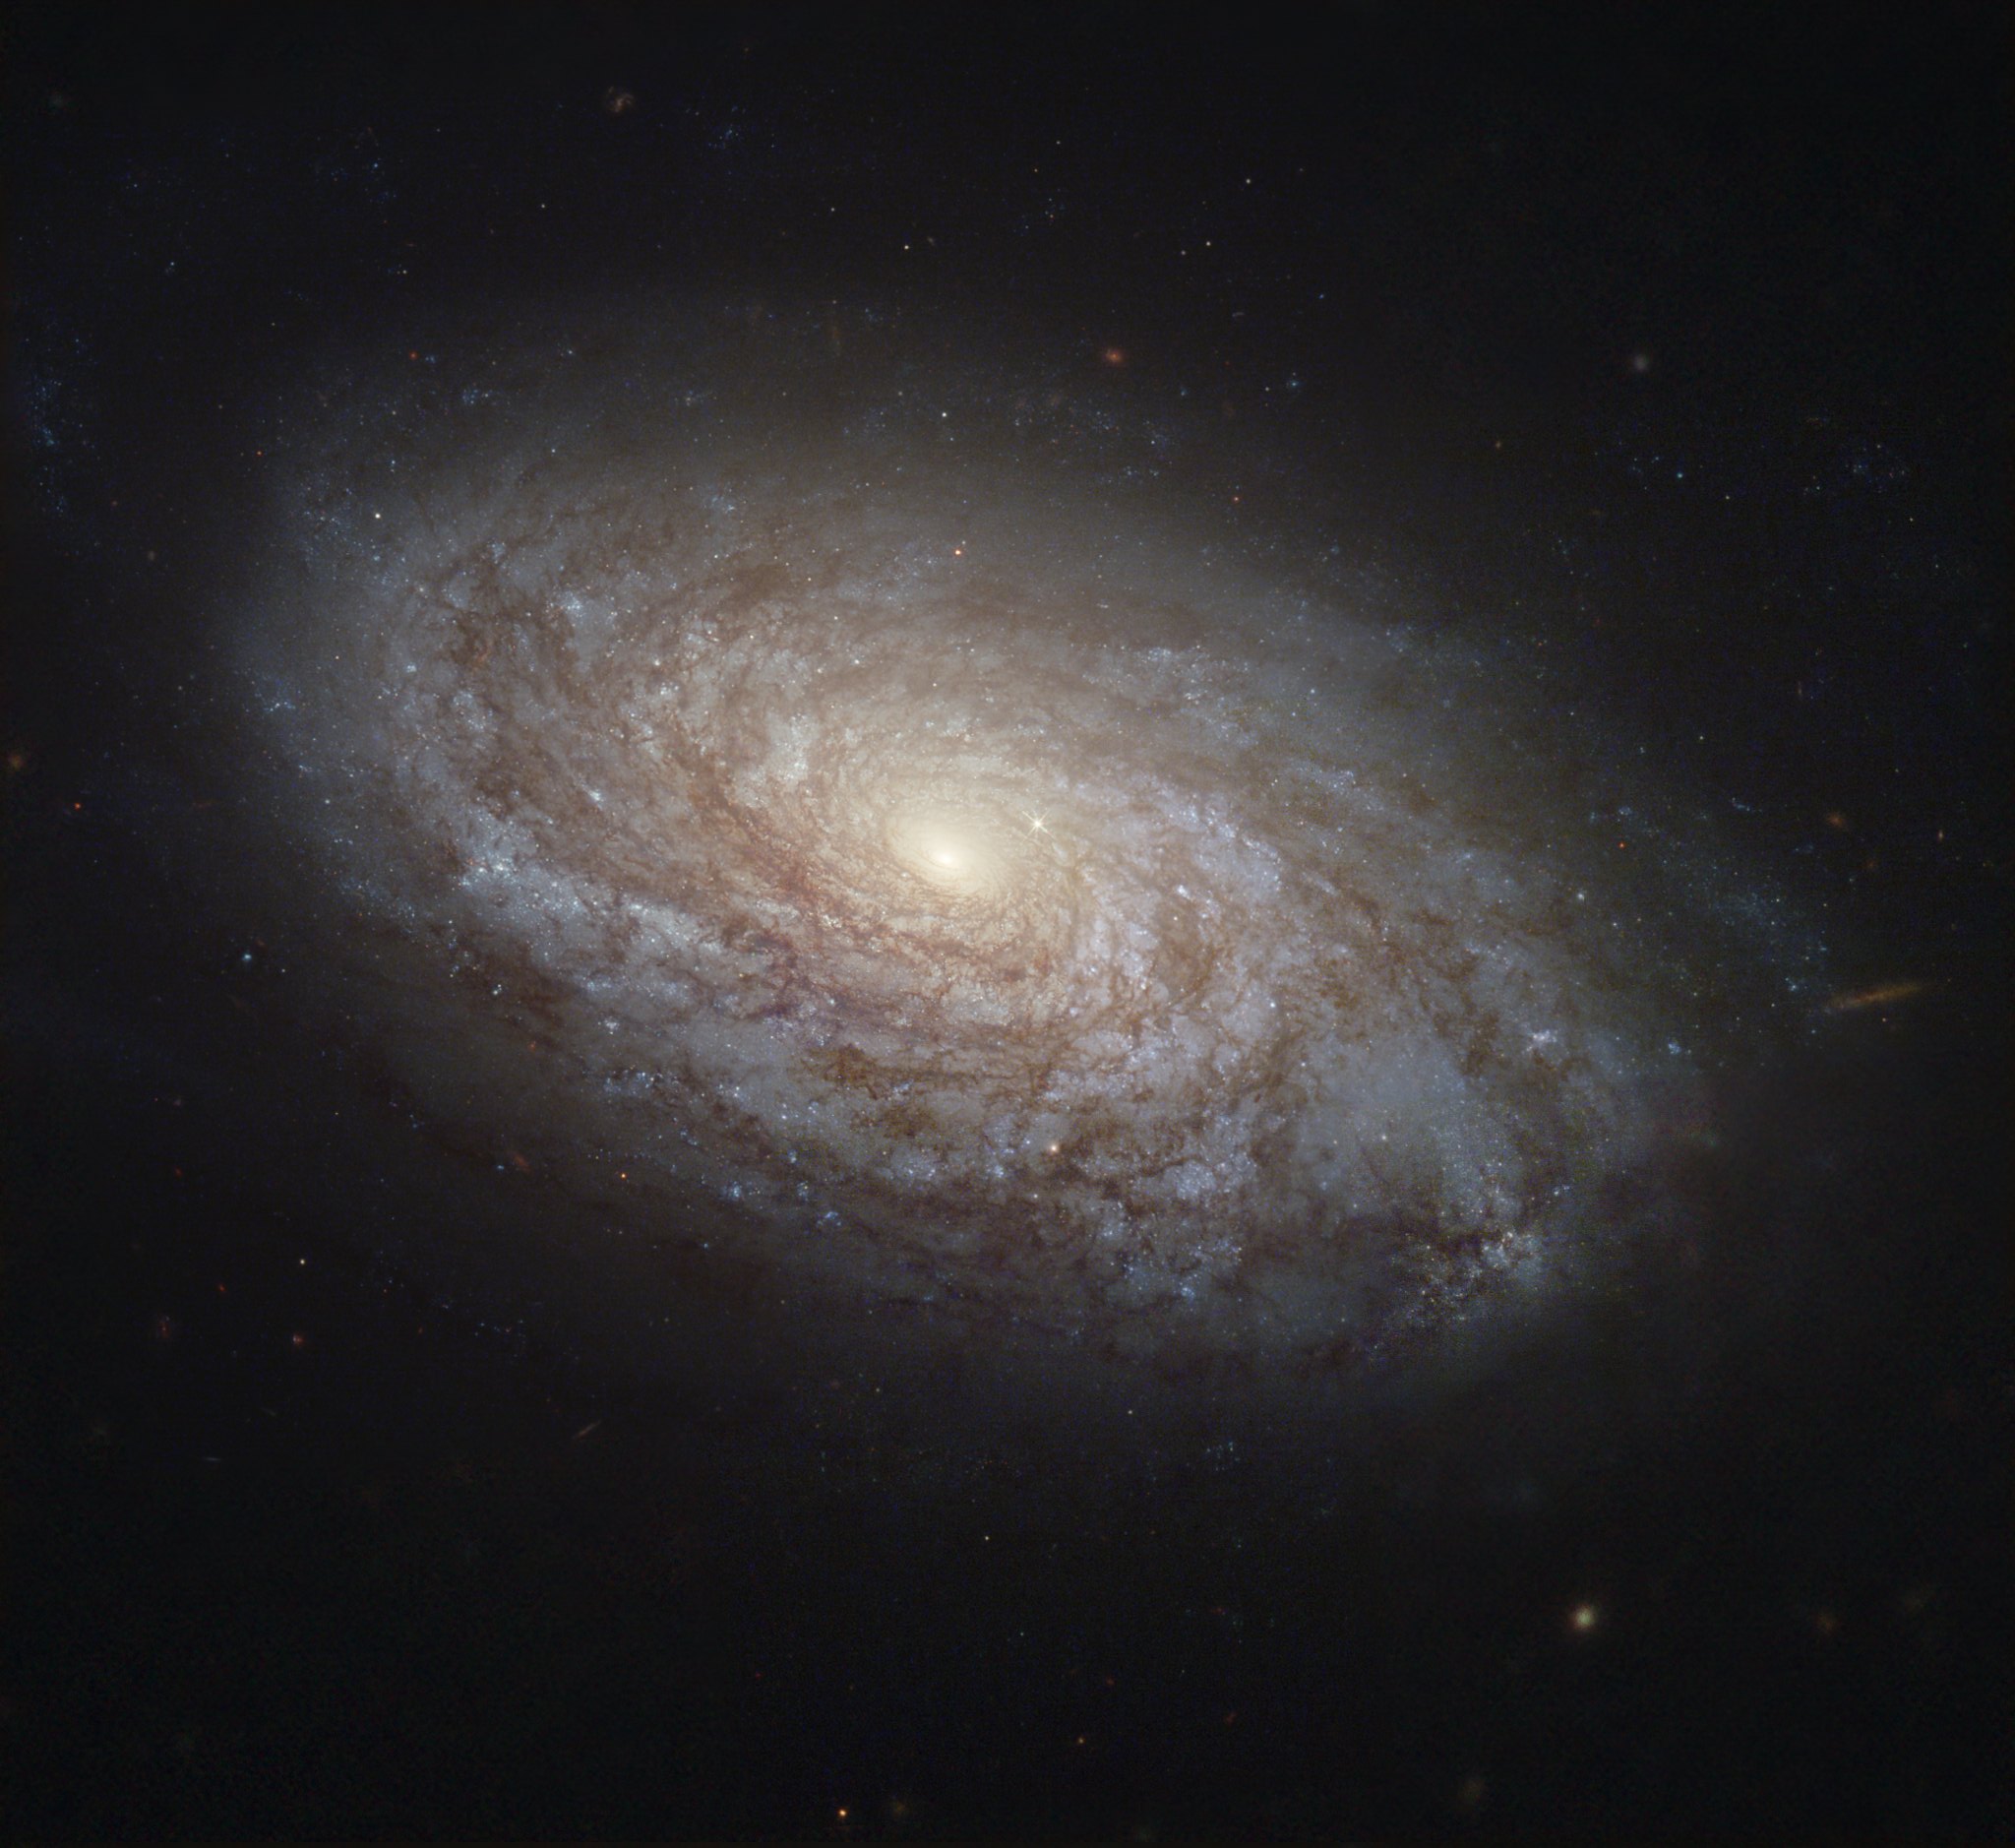
NGC 4414 is a great example of a Sc-type galaxy, the type closest of the average spiral galaxy used as white reference by default. Image Credit: NASA, ESA, W. Freedman (U. Chicago) et al, & the Hubble Heritage Team (AURA/STScI), SDSS; Processing: Judy Schmidt.
Tip
Summary of Stellar Spectral Classifications Stellar classifications have two parts, a Morgan-Keenan type and a Luminosity index.
The first part of the spectral classification (G2 in the case of the Sun) takes one of the following letters: O, B, A, F, G, K, M. O represents extremely hot blue stars, while M represents cool red stars. The sun is roughly in the middle of the spectrum. The number represents intermediate cases, for example a B5 star is halfway between type B and type A.
The second part of the spectral classification is the luminosity index ranging from i to v. Stars with luminosity index i are supergiants, whereas stars with luminosity index v are dwarfs. Main sequence stars such as the sun have a luminosity index of iv.
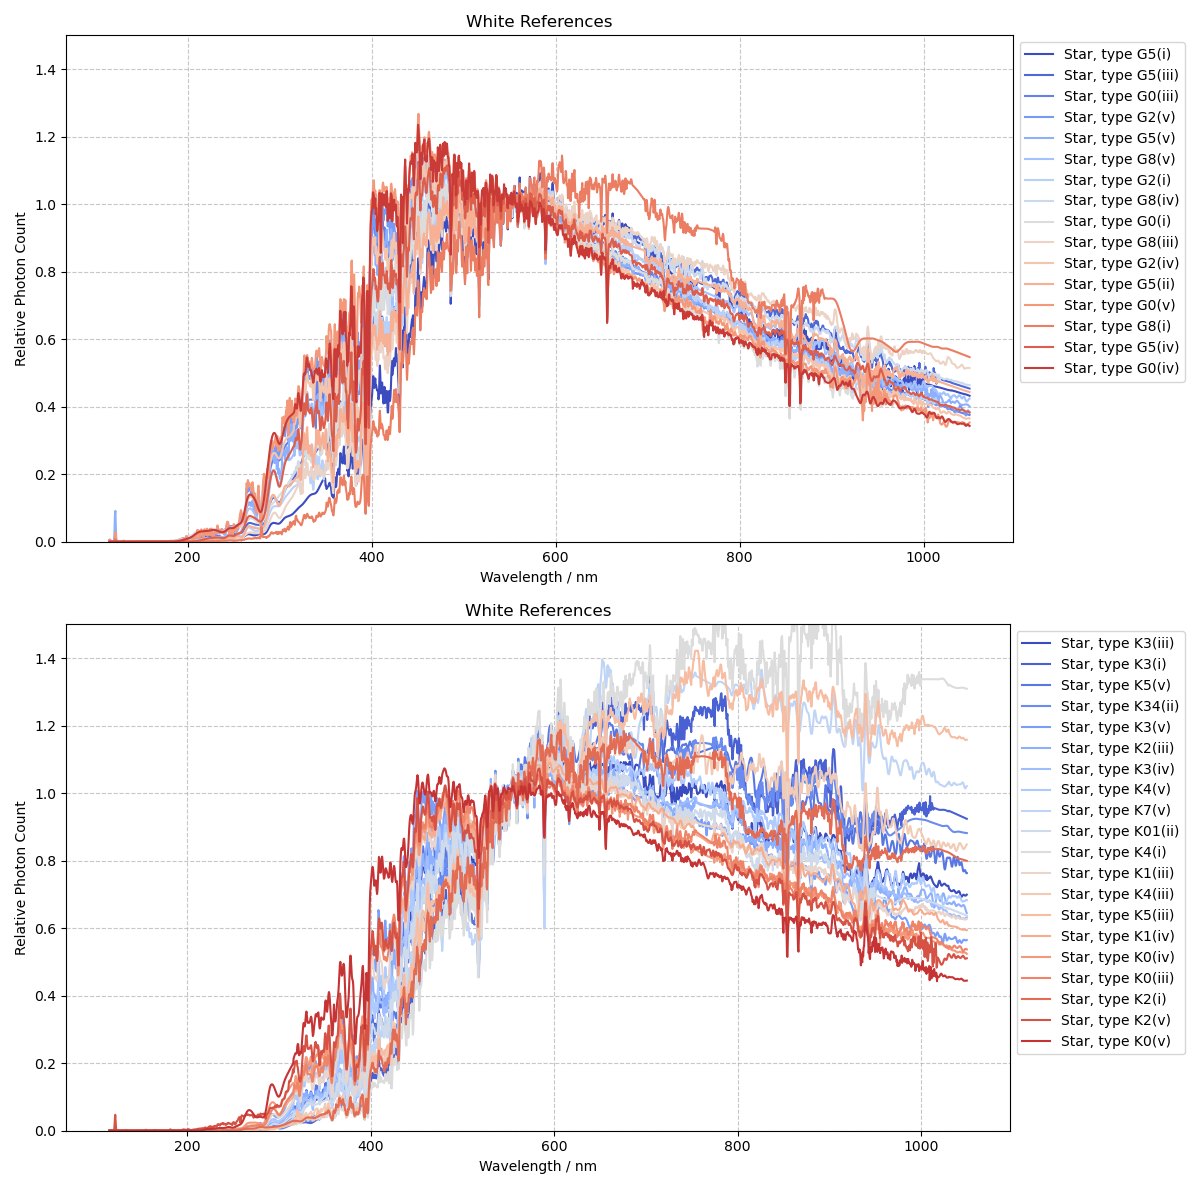
Graphs showing white reference data for a set of two different star classes, G and K.
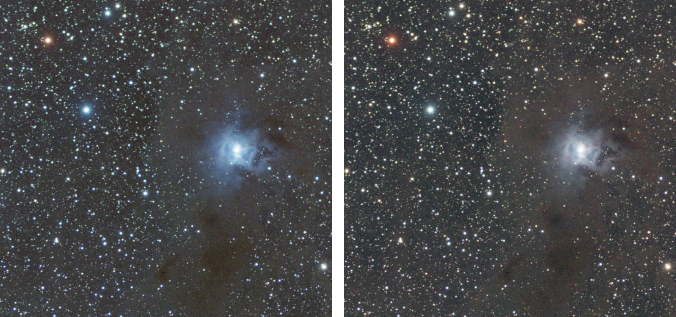
Difference in color calibration depending on the choice of white reference. On the left, an M-type star, on the right the average spiral galaxy. Please note that the data are linear, and only an autostretch has been applied to the visualization.
The interface allows you to view details of the selected sensor, filter and white reference using the Details button next to each combo box. From the details information box that this brings up you also have the option to plot the Quantum Efficiency (for sensors) or transmittance (for filters) or relative photon count (for white references) against wavelength. A Plot All button is also available in the main SPCC dialog which allows you to see the responses of all your filters and your sensor and the white reference spectrum all plotted together.

Plotting all the responses of all your filters and your sensor and the white reference spectrum all plotted together
When you are happy, click Apply and SPCC will run. It will cache catalogue data but the first time you apply it to an image it will take a few seconds to perform the online catalogue searches and retrieve the source and spectral data. SPCC will then be applied to the image. Additional plots showing the linear fit of the catalogue Red / Green and Blue / Green to image Red / Green and Blue / Green ratios.
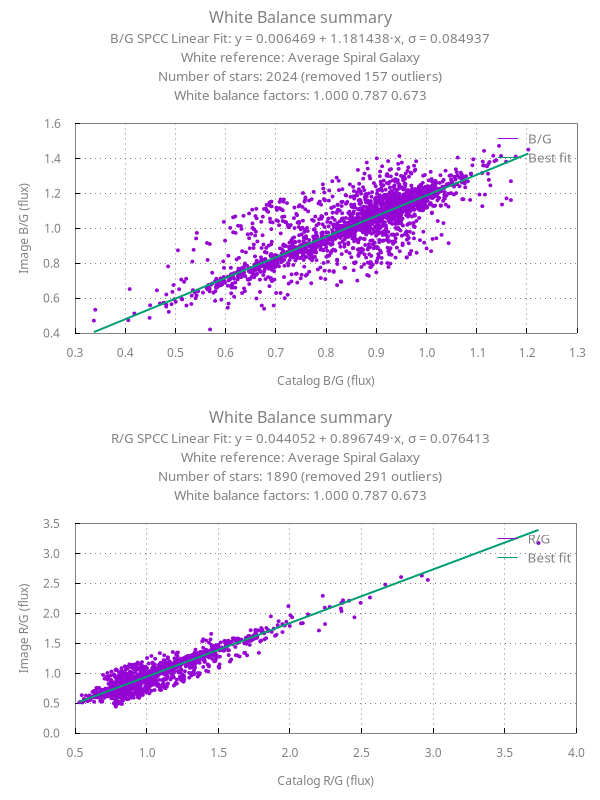
By default, Siril outputs graphs showing the fits used in the process. In this example the magnitude was limited to 17.
Tip
How do I process L-RGB images? We recommend that you process them as normal RGB images. In fact, the L filter generally has very good transmission in the visible range and therefore has little influence on image colorimetry.
Saved Preferences
As most users are likely to do most of their imaging with one setup, or maybe two, it would be tedious to reselect the sensor and filters each time. The user choices are therefore automatically remembered when set and restored next time the tool is used, even if Siril is closed and restarted in between. This works using the preferences system but there is no need to use the preferences dialog to remember the set sensor and filters, it is done automatically.
The chosen white reference is not remembered: the default Average Spiral Galaxy is a suitable choice for most astronomical scenes, and alternative white references would normally be set for a specific image to draw out a particular aspect of the color.
Siril command line
spcc [-limitmag=[+-]] [ { -monosensor= [ -rfilter= ] [-gfilter=] [-bfilter=] | -oscsensor= [-oscfilter=] [-osclpf=] } ] [-whiteref=] [ -narrowband [-rwl=] [-gwl=] [-bwl=] [-rbw=] [-gbw=] [-bbw=] ] [-bgtol=lower,upper]
spcc_list { oscsensor | monosensor | redfilter | greenfilter | bluefilter | oscfilter | osclpf | whiteref }
Color Saturation
This tool is used to increase the color saturation of the image. It is possible to choose between a specific hue or the global hue to enhance. The strength of the saturation is adjusted with the slider Amount.
The Background factor slider sets the factor multiplied by the background value. Lower is the value, stronger is the saturation effect. While a high value will preserve the background.
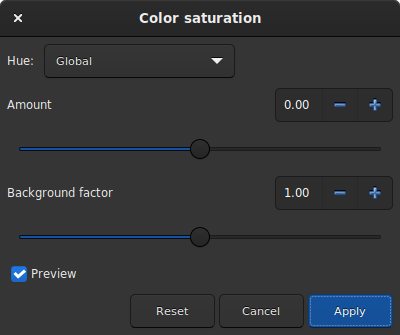
Color Saturation dialog window.
Siril command line
satu amount [background_factor [hue_range_index]]
Remove Green Noise
Because green is not naturally present in deep sky images (except for comets and some planetary nebulae), if the image has already been calibrated, its colors are well balanced and the image is free of any gradient, we can assume that if the image contains green, it belongs to the noise. It is then interesting to find a method to remove this dominant green. This is exactly what the Remove Green Noise tool proposes, which is derived from the Subtractive Color Noise Reduction tool, but for green only.
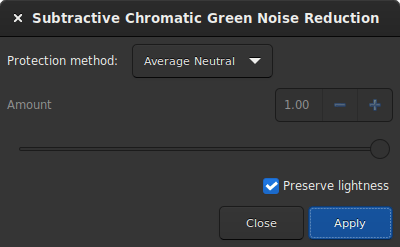
Remove Green Noise dialog window.
Warning
This tool is not intended for direct use on a typical green image from a stack where the background sky level has not been equalized. Its use in such conditions would destroy the image's chrominance.
This tool has 3 settings. The protection method, the amount (called \(a\) in the following section), and a Preserve lightness button. The following methods present the different existing ways to remove the green pixels by replacing them with a mix of Red and Blue. The amount is only available for methods with mask protection. The choice of its value must be done with caution in order to minimize the rise of the magenta cast in the sky background. Do not hesitate to use the Undo and Redo buttons in order to fine-tune the value.
Protection method
Maximum Mask Protection
Additive Mask Protection
Average Neutral Protection (default method)
Maximum Neutral Protection
Finally, the Preserve lightness button preserves the original CIE L* component in the processed image, in order to only process chromatic component, it is highly recommended to let this option checked.
Siril command line
rmgreen [-nopreserve] [type] [amount]
Negative Transform
Negative transformation refers to subtracting pixel values from \((L−1)\), where \(L\) is the maximum possible value of the pixel, and replacing it with the result.
The Negative transformation tool is different from the negative
view in the toolbar. Indeed, the transformation is not
only visual, but actually applied to the pixel values. If you save the image,
it will be saved as a negative.
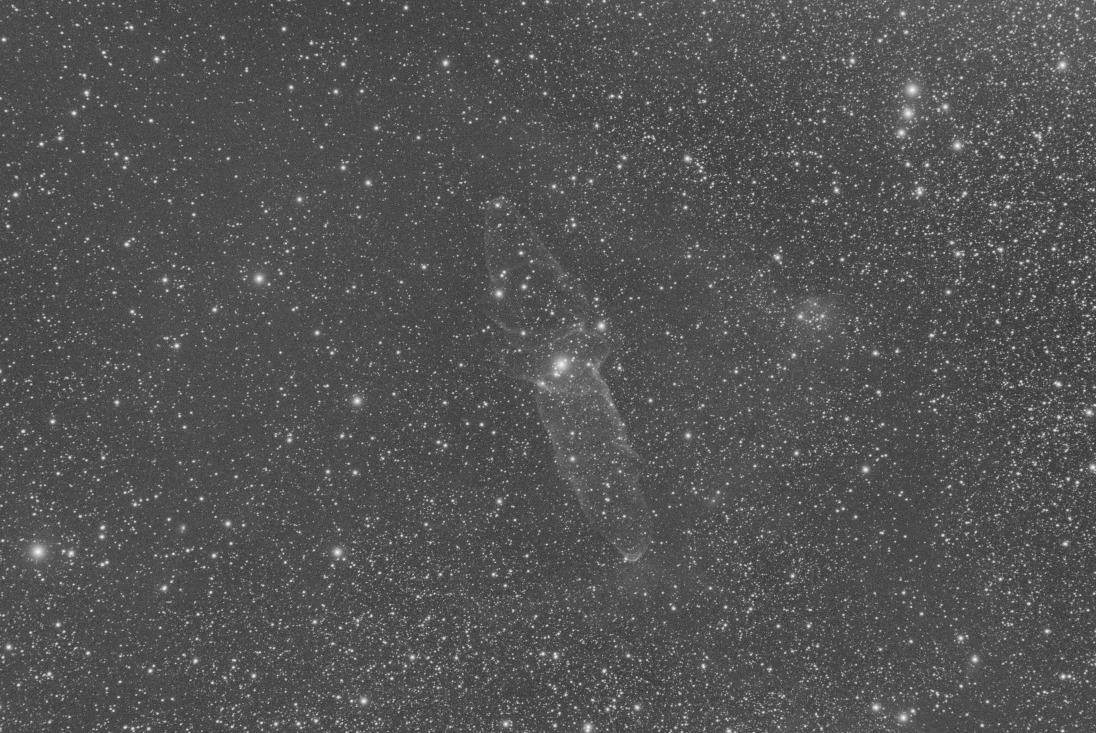
Original image with weak signal (Image Cyril Richard).
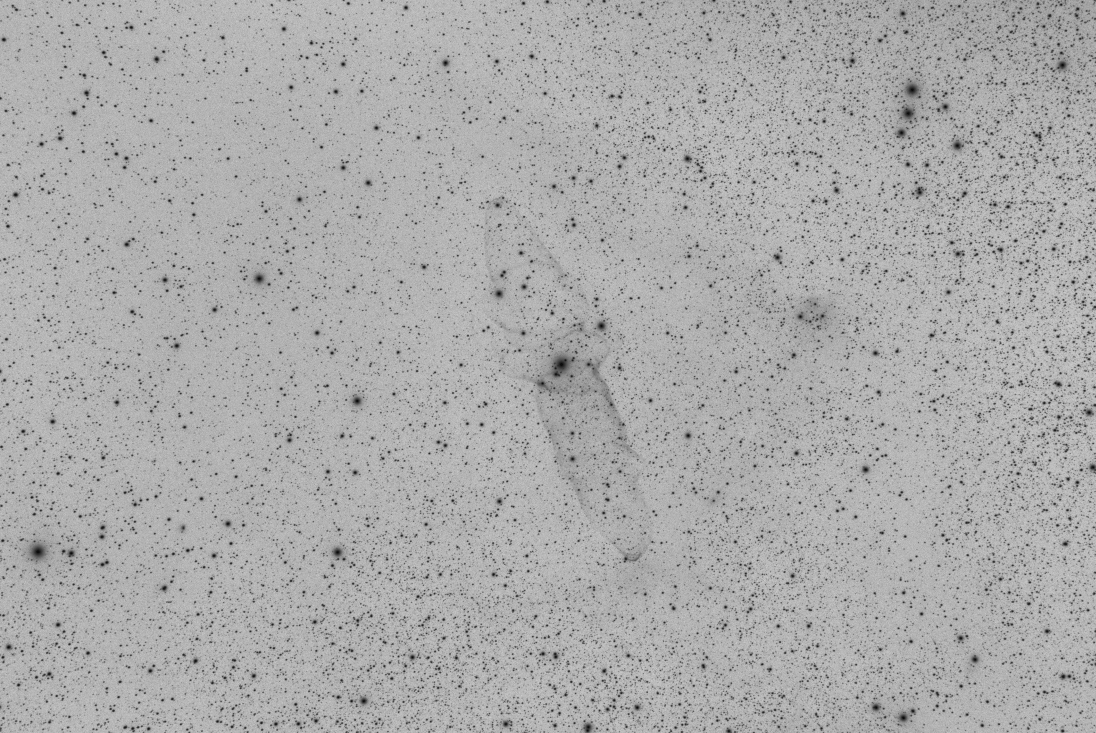
Negative image where the signal is more visible (Image Cyril Richard).
Tip
A common use of the negative transformation tool is to remove the magenta cast from SHO images. In this case one need to apply Negative transformation, then Remove Green Noise, then Negative transformation again.
Siril command line
neg
References
Vallenari, A., et al. "Gaia Data Release 3-Summary of the content and survey properties." Astronomy & Astrophysics 674 (2023): A1. 99(613), 191.