Colors

Color Calibration

Siril offers two ways to retrieve the colors of your image. Here, "retrieve" means re-balancing the RGB channels to get as close as possible to the true colors of the shot object.

Manual Color Calibration

Warning

The color calibration must be performed on a linear image whose histogram has not yet been stretched. Otherwise, the colors obtained are not guaranteed to be correct.

The manual way uses the following window:

dialog

Manual Color Calibration dialog window.

The first step deals with the background of your image. The goal is to equalize the RGB layers in order the background appears as a neutral grey color.

After making a selection in your image (in a not so crowdy nor contrasted area), the area is taken into account by clicking on the Use current selection button. The coordinates of the rectangle are displayed. Then Background Neutralization will calculate the median of each channel and equalize them.

The second step deals with the bright objetcs of the picture. You can modify once again the histogram in two ways:

  • Manually, with White reference and the 3 R, G and B coefficients, according to your own taste.

  • Automatically, by selecting a rectangle area with contrasted objects (the same way as previously)

Two sliders allow you to change the rejection limit for too dark and too bright pixels in the selection.

As this is a trial and error process, you can undo the result with the Undo button (up left) and then try with other selections or coefficients until you are satisfied.

Photometric Color Calibration

Warning

The calibration of the colors by photometry must imperatively be carried out on a linear image whose histogram was not yet stretched. Without what, the photometric measurements will be wrong and the colors obtained without guarantee of being correct.

Another way for retrieving the colors is to compare the color of the stars in the image with their color in catalogues, to obtain the most natural color in an automatic and non-subjective way. This is the PCC (Photometric Color Calibration) tool. It can only work for images taken with a set of red, green and blue filters for colors, or on-sensor color. To identify stars within the image with those of the catalogue, an astrometric solution is required. Running the PCC tool will first do that, so for this first part, please see the documentation of the plate solver module.

Note

This technique is heavily dependent on the type of filter used. Using different kinds of R, G, B filters will not make a large difference, but using a Light pollution filter or no IR-block filters will make the solution deviate significantly and not give the expected colors.

Since version 1.2, the two tools run independently: it is possible to run the photometric analysis and color correction of the image only if the image has been already plate solved. It also means different catalogues can be used for PCC and astrometry. And now, the tool is also available as the pcc command, so it can be embedded in image post-processing scripts.

dialog

Photometric Color Calibration dialog window.

If the image was previously plate solved, turn on the annotations feature to check that catalogues align with the image. If the astrometric solution is not good enough, checking Force plate solving will force its recomputation as part of the PCC process.

As a reminder from the plate solver documentation, here is a summary of the options visible in the window:

  • Make sure the sampling is correct, computed from the focal length and pixel size found in the image or copied from the settings.

  • The Flip image if needed allows to reorient the image correctly according to the astrometry result.

  • For some oversampled or too large images, it is useful to check the Downsample image to have more chances of success with the plate solving and it's also faster.

  • The Auto-crop (for wide field) option will limit the field to 5 degrees in case you are dealing with very wide field images, mostly useful for plate solving.

  • The Catalog Settings section allows you to choose which photometric catalog should be used, NOMAD or APASS, as well as the limiting magnitude.

    Tip

    The NOMAD catalog can be installed locally, while the APASS catalogue needs an internet access to get its content.

  • The Star Detection section allows you to manually select which stars will be used for the photometry analysis. It's better to have hundreds of them at least, so individual picking would not be ideal.

    PCC star detection
  • If desired, the Background Reference can be manually selected as described in Manual Color Calibration. This can be useful in the case of nebula images where the background sky parts are small.

    PCC background

When enough stars are found and the astrometric solution is correct, the PCC will print this kind of text in the Console tab:

Applying aperture photometry to 433 stars.
70 stars excluded from the calculation
Distribution of errors: 1146 no error, 18 not in area, 48 inner radius too small, 4 pixel out of range
Found a solution for color calibration using 363 stars. Factors:
K0: 0.843       (deviation: 0.140)
K1: 1.000       (deviation: 0.050)
K2: 0.743       (deviation: 0.130)
The photometric color correction seems to have found an imprecise solution, consider correcting the image gradient first

We can understand that 433 stars were selected from the catalogue and the image for photometric analysis, but somehow, only 363 we actually used, 70 being excluded. The line Distribution of errors explains for what reason they were excluded: 18 were not found in the expected position, 48 were too big and 4 probably saturated. It is very common to have many stars rejected because they don't meet the strict requirements for a valid photometric analysis.

We can also see that the PCC found three coefficients to apply to the color channels to correct the white balance. The deviation here, which is the average absolute deviation of the color correction for each of the star of the photometric set, is moderately high. On well calibrated images without gradient, with correct filters and without a color nebula covering the whole image, devation would get closer to 0.

Siril command line

pcc [image_center_coords] [-noflip] [-platesolve] [-focal=] [-pixelsize=] [-limitmag=[+-]] [-catalog=] [-downscale]
Run the Photometric Color Correction on the loaded image.
If the image has already been plate solved, the PCC can reuse the astrometric solution, otherwise, or if WCS or other image metadata is erroneous or missing, arguments for the plate solving must be passed:
the approximate image center coordinates can be provided in decimal degrees or degree/hour minute second values (J2000 with colon separators), with right ascension and declination values separated by a comma or a space.
focal length and pixel size can be passed with -focal= (in mm) and -pixelsize= (in microns), overriding values from image and settings.
you can force the plate solving to be remade using the -platesolve flag.

Unless -noflip is specified and the image is detected as being upside-down, the image will be flipped if a plate solving is run.
For faster star detection in big images, downsampling the image is possible with -downscale.

The limit magnitude of stars used for plate solving and PCC is automatically computed from the size of the field of view, but can be altered by passing a +offset or -offset value to -limitmag=, or simply an absolute positive value for the limit magnitude.
The star catalog used is NOMAD by default, it can be changed by providing -catalog=apass. If installed locally, the remote NOMAD (the complete version) can be forced by providing -catalog=nomad

Links: nomad

Color Saturation

This tool is used to increase the color saturation of the image. It is possible to choose between a specific hue or the global hue to enhance. The strength of the saturation is adjusted with the slider Amount.

The Background factor slider sets the factor multiplied by the background value. Lower is the value, stronger is the saturation effect. While a high value will preserve the background.

dialog

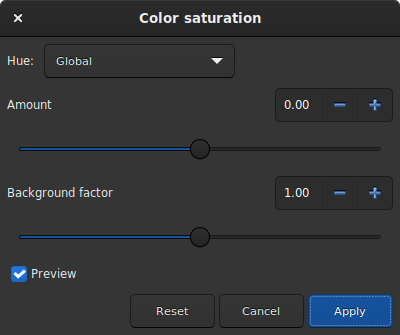
Color Saturation dialog window.

Siril command line

satu amount [background_factor [hue_range_index]]
Enhances the color saturation of the loaded image. Try iteratively to obtain best results.
amount can be a positive number to increase color saturation, negative to decrease it, 0 would do nothing, 1 would increase it by 100%
background_factor is a factor to (median + sigma) used to set a threshold for which only pixels above it would be modified. This allows background noise to not be color saturated, if chosen carefully. Defaults to 1. Setting 0 disables the threshold.
hue_range_index can be [0, 6], meaning: 0 for pink to orange, 1 for orange to yellow, 2 for yellow to cyan, 3 for cyan, 4 for cyan to magenta, 5 for magenta to pink, 6 for all (default)

Remove Green Noise

Because green is not naturally present in deep sky images (except for comets and some planetary nebulae), if the image has already been calibrated, its colors are well balanced and the image is free of any gradient, we can assume that if the image contains green, it belongs to the noise. It is then interesting to find a method to remove this dominant green. This is exactly what the Remove Green Noise tool proposes, which is derived from the Subtractive Color Noise Reduction tool, but for green only.

dialog

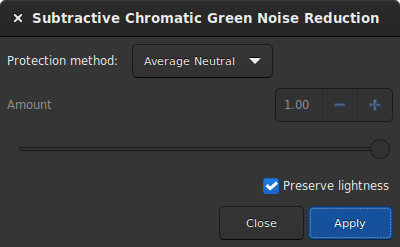
Remove Green Noise dialog window.

Warning

This tool is not intended for direct use on a typical green image from a stack where the background sky level has not been equalized. Its use in such conditions would destroy the image's chrominance.

This tool has 3 settings. The protection method, the amount (called \(a\) in the following section), and a Preserve lightness button. The following methods present the different existing ways to remove the green pixels by replacing them with a mix of Red and Blue. The amount is only available for methods with mask protection. The choice of its value must be done with caution in order to minimize the rise of the magenta cast in the sky background. Do not hesitate to use the Undo and Redo buttons in order to fine-tune the value.

Protection method

Maximum Mask Protection

\[\begin{split}m &= \text{max}(R,B) \\ G'&= G\times (1 — a)\times (1 — m) + m\times G\end{split}\]

Additive Mask Protection

\[\begin{split}m &= \text{min}(1,R+B) \\ G'&= G\times (1 — a)\times (1 — m) + m\times G\end{split}\]

Average Neutral Protection (default method)

\[\begin{split}m &= 0.5\times (R + B) \\ G'&= \text{min}(G, m)\end{split}\]

Maximum Neutral Protection

\[\begin{split}m &= \text{max}(R,B) \\ G'&= \text{min}(G, m)\end{split}\]

Finally, the Preserve lightness button preserves the original CIE L* component in the processed image, in order to only process chromatic component, it is highly recommended to let this option checked.

Siril command line

rmgreen [-nopreserve] [type] [amount]
Applies a chromatic noise reduction filter. It removes green tint in the current image. This filter is based on PixInsight's SCNR and it is also the same filter used by HLVG plugin in Photoshop.
Lightness is preserved by default but this can be disabled with the -nopreserve switch.

Type can take values 0 for average neutral, 1 for maximum neutral, 2 for maximum mask, 3 for additive mask, defaulting to 0. The last two can take an amount argument, a value between 0 and 1, defaulting to 1

Negative Transform

Negative transformation refers to subtracting pixel values from \((L−1)\), where \(L\) is the maximum possible value of the pixel, and replacing it with the result.

The Negative transformation tool is different from the negative view negative-icon in the toolbar. Indeed, the transformation is not only visual, but actually applied to the pixel values. If you save the image, it will be saved as a negative.

dialog

Original image with weak signal (Image Cyril Richard).

dialog

Negative image where the signal is more visible (Image Cyril Richard).

Tip

A common use of the negative transformation tool is to remove the magenta cast from SHO images. In this case one need to apply Negative transformation, then Remove Green Noise, then Negative transformation again.

Siril command line

neg
Changes pixel values of the currently loaded image to a negative view, like 1-value for 32 bits, 65535-value for 16 bits. This does not change the display mode